Bottle feeding your baby

Feeding is a special time for you to create a strong and secure bond with your baby. If you and your partner give your baby most of their feeds yourselves, this will promote a close and loving relationship with your baby and help them feel safe and secure. Being held and fed by different people with different techniques can be stressful for your baby.

Responsive bottle feeding supports that special bond between you and your baby as you:

  • offer your baby a bottle in response to their feeding cues
  • gently invite your baby to take the teat into their mouth
  • feed your baby using a paced bottle-feeding technique

By using a paced bottle-feeding technique, you will allow your baby to control both the flow of milk and the amount of milk they drink.  Your baby may take regular breaks and will let you know when they have finished. By slowing down the flow of milk into your baby’s mouth you will also reduce the amount of air they take in.

Feeding your baby using a paced bottle-feeding technique also prevents you from overfeeding your baby and helps reduce their risk of becoming overweight.

1.  Feed your baby when they show signs of being hungry. Look for feeding cues (such as head turning, mouth opening or sucking on fingers). Crying is the last sign of hunger, so try to feed your baby before they cry. 

2. Hold your baby close in a semi-upright position, so you can see their face. Reassure them by looking into their eyes and talking to them. Begin the feed by gently rubbing the teat of the bottle against their top lip, inviting them to open their mouth. 

3. Gently insert the teat into your baby’s mouth, keeping the bottle in a horizontal position so that just enough milk covers the hole in the teat. This will stop the milk from flowing too fast. 

4. Your baby may need some short breaks during the feed and may need to occasionally burp. Watch your baby and follow their cues for when they need a break. Cues will vary from one baby to the next. They may splay their fingers and toes, spill milk out of their mouth, stop sucking, turn their head away or push the bottle away. When you see these cues, gently remove the teat from your baby’s mouth or tilt the bottle downwards to cut off the flow of milk. When your baby does not want any more milk, hold them upright and gently rub or pat their back to bring up any wind. 

5. If the teat becomes flattened while you are feeding, gently put your finger into the corner of your baby’s mouth to release the vacuum.

For more information about bottle feeding your baby, please visit:

www.unicef.org.uk/babyfriendly/baby-friendly-resources/bottle-feeding-resources

www.unicef.org.uk/babyfriendly/wp-content/uploads/sites/2/2019/04/Infant-formula-and-responsive-bottle-feeding.pdf

https://www.youtube.com/watch?v=4Rpl8H5V0pY

When you first start bottle feeding your baby, you may wonder how much milk your baby needs. This is normal and it can take a while to feel confident that your baby is getting what they need.

A baby’s stomach is very small when they are born (approximately the size of a cherry), so they will need small, frequent feeds during the first few days and may not finish their bottle.

Day one

Day three

One week

One month

Size of a cherry

Size of a walnut

Size of an apricot

Size of a large egg

5-7ml/0.2oz

22-27ml/0.75-1oz

45-60ml/1.5-2oz

80-150ml/2.5-5oz


The amount of milk and frequency of the feeds will depend on your baby’s individual needs. Forcing your baby to drink large amounts of milk and finish a feed will not cause them to sleep for longer between feeds. Instead, it can make them more uncomfortable and less able to settle.

The number of wet and dirty nappies your baby produces, and your baby’s weight gain will let you know if your baby is getting enough milk.

You can use the guide below to see if bottle feeding is going well or if you would benefit from some support from your midwifery or health visiting service.

Signs that bottle feeding is going well

Your baby is:

  • alert, has good muscle tone and is a normal skin colour
  • being fed responsively
  • invited to take the teat into their mouth and the bottle is held horizontally allowing just enough milk to cover the teat
  • calm and relaxed during a feed and content after most feeds
  • producing the expected number of wet and dirty nappies according to their age
  • is receiving expressed breastmilk and/or first stage formula milk (unless a specialist milk has been prescribed or advised by a health professional)

You or your baby’s main care giver are:

  • recognising and responding to your baby’s early feeding cues
  • giving most of the feeds
  • holding your baby in close, in a semi upright position and maintaining eye contact
  • aware of when your baby needs a break and when your baby has had enough milk (turning away, splaying hands, or spitting out milk)
  • are confident with washing and sterilising your baby’s feeding equipment
  • expressing breastmilk effectively and/or making and storing formula milk safely as per the manufacturer’s guidelines

There are no concerns about your baby’s weight gain and/or growth

Your baby’s weight gain and the number of wet and dirty nappies they produce will tell you if your baby is getting enough milk. Formula-fed babies may have firmer and less frequent poos when compared to a breastfed baby of the same age. If you are concerned your baby is not drinking enough milk, contact your midwifery or health visiting service.

When

Wet nappies (wee)

Dirty nappies (poo)

Day 1 


A minimum of 1 wet nappy in 24 hours.

Your baby’s nappy may contain rust (orange-brown) coloured spots of concentrated urine. These are known as urates. At this age, they are not a problem, but if they continue beyond the first couple of days, you should tell your midwife as they can be a sign that your baby is not getting enough milk.

   + 


A minimum of 1 dirty nappy in 24 hours.

Your baby’s poo will be a dark green or black colour and tar-like. This is known as ‘meconium.’ 

Day 2

  +                              

A minimum of 2 wet nappies in 24 hours.

Your baby’s nappy may contain rust (orange-brown) coloured spots of concentrated urine. These are known as urates. At this age, they are not a problem, but if they continue beyond the first couple of days, you should tell your midwife as they can be a sign that your baby is not getting enough milk.

+


A minimum of 1 dirty nappy in 24 hours.

Your baby’s poo will be a dark green or black colour and tar-like. This is known as ‘meconium.’ 

Day 3 

+

A minimum of 3 wet nappies in 24 hours.

Your baby’s nappies should feel heavier.


+


A minimum of 2 dirty nappies in 24 hours.

Your baby’s poo will change to a green, yellow, yellowish-brown colour and be looser in consistency. This is known as a ‘changing stool’.

Day 4

+

A minimum of 4 wet, heavy nappies in 24 hours.


+                         

A minimum of 2 dirty nappies in 24 hours.

Your baby’s poo will change to a green, yellow, yellowish-brown colour and be looser in consistency. This is known as a ‘changing stool’.

Day 5

+

A minimum of 5 wet, heavy nappies in 24 hours.


+

A minimum of 2 dirty nappies in 24 hours.

Your baby’s poo will be soft and yellow.

Day 6

+

A minimum of 6 wet, heavy nappies in 24 hours.


+

A minimum of 2 dirty nappies in 24 hours.

Your baby’s poo will be soft and yellow.


4 to 6 weeks

+

A minimum of 6 wet, heavy nappies in 24 hours.

+
A minimum of 1 dirty nappy in 24 hours.

Your baby’s poo will soft and a brownish-yellow colour.


  1. Wash your hands well with soap and water. 
  2. Clean the work surfaces with hot, soapy water.
  3. Check that the bottle and teat are not damaged. Then clean the bottle and teat in hot, soapy water using a clean bottle brush. A dishwasher will clean the bottle-feeding equipment, but it won’t sterilise it.
  4. Rinse all your equipment in clean, cold running water before sterilising.

1. Steam (electric or microwave)

It is important that you closely follow the manufacturer’s instructions and guidance, as there are many models and pieces of equipment available to choose from.

2. Cold water sterilising solution

It is important that you closely follow the manufacturer’s instructions and guidance.

1.     Make sure there is no air trapped in the bottles or teats when putting them into the sterilising solution.

2.     Leave the equipment in the sterilising solution for at least 30 minutes.

3.     Keep the equipment under the sterilising solution with a floating cover.

4.     Change the sterilising solution every 24 hours.

3. Boiling

1.     Make sure that the feeding equipment you plan to sterilise is safe to boil.

2.     Boil the equipment in water for at least 10 minutes, making sure that all the equipment stays under the surface of the water. You may need to use a small plate to keep the bottles under the water. Never leave hot pans and liquids unattended.

Teats tend to get damaged faster with this sterilising method. Check them thoroughly for damage after boiling them before using them to feed your baby

For more information about sterilising your feeding equipment, please visit:

www.unicef.org.uk/babyfriendly/wp-content/uploads/sites/2/2022/10/Bottle-feeding-leaflet.pdf

Powdered infant formula is not sterile and needs to be made up at a temperature which will kill any potential bacteria present. Even when tins and packets of powdered infant formula are sealed, they can sometimes contain bacteria. It is therefore important to know how to make and store infant formula milk safely and reduce the risk of your baby becoming unwell with an infection.

To reduce your baby’s risk of infection:

  • all equipment needs to be sterilised
  • each bottle of formula milk should be freshly made when it is needed
  • leftover formula milk should be discarded at the end of a feed
  • unused bottles of formula milk should be discarded if they have been kept at room temperature for over 2 hours (bacteria multiply very fast at room temperature and can also survive and multiply when in the fridge)

It is also important to follow the manufacturer’s instructions very carefully and use the scoop provided. The amount of water and powder may vary according to the brand.

Do not:

  • add extra formula powder (this can make your baby constipated or dehydrated)
  • add extra water (too little powder may not give your baby enough nourishment)
  • add sugar or cereals to your baby's formula
  •  warm up formula milk in a microwave (it may heat the milk unevenly and burn your baby's mouth)

  Formula feeding to go with point 1.png

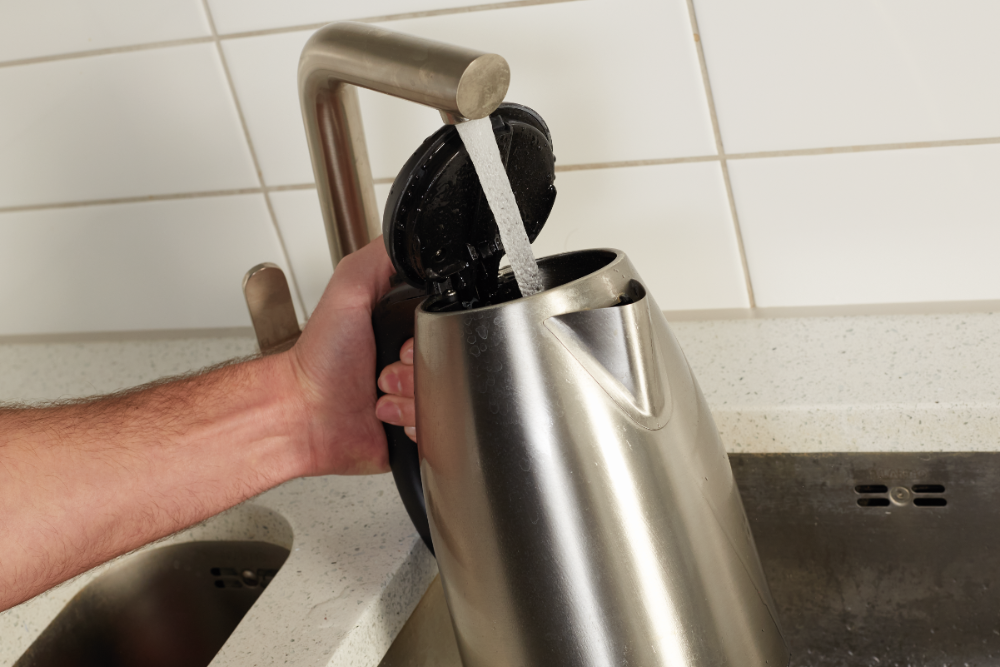
1.  Empty your kettle and refill it with at least one litre of fresh tap water from the cold tap. Do not use water that has been previously boiled or water that has been softened. Bottled water is not recommended to make up a feed as it is not sterile and may contain too much salt (sodium) or sulphate.

   Formula milk point 2.png   

2. Boil the water. Leave the water to cool in the kettle for no more than 30 minutes, so that it remains at a temperature of at least 70°C. If less water is used, the cooling time will be significantly shorter.

   Formula milk point 3.png 

3. Clean and disinfect the work surface you are going to use. It is also really important that you wash your hands with soap and water to stop bacteria spreading.

4. If you are using a cold-water steriliser, shake off any excess sterilising solution from the bottle and the teat, or rinse the bottle with cooled boiled water from the kettle (not the tap).
   Formula feeding to go with point 5.jpg 

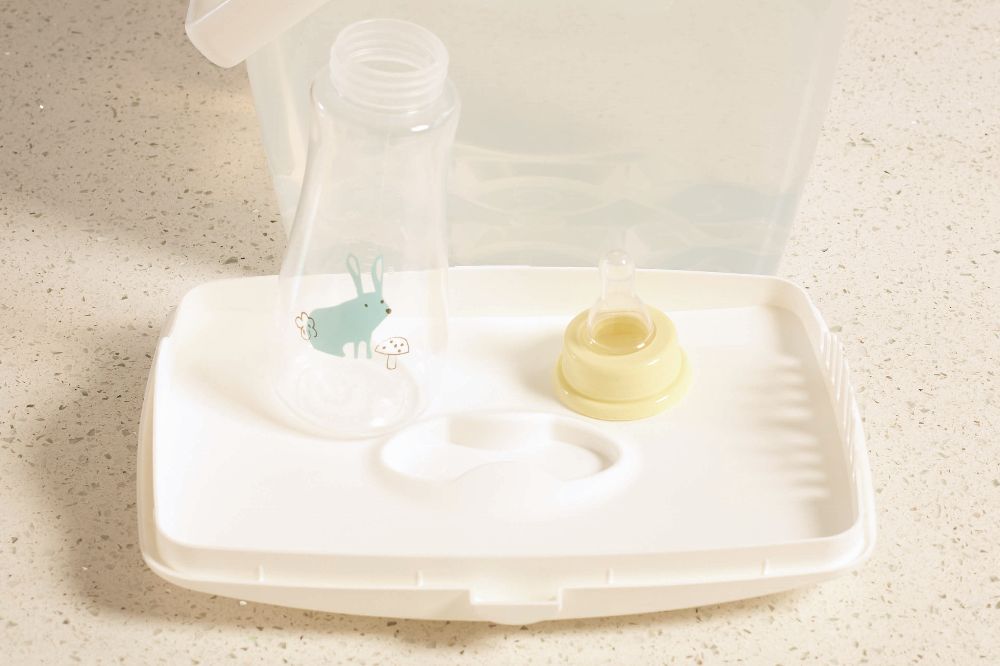
5. Keep the teat and cap on the upturned lid of the steriliser. Avoid putting them on the work surface.

6.   Follow the manufacturer’s instructions and pour the correct amount of water into the bottle first. Double check the water level is correct. 
  Formula milk to go with point 7.jpg 

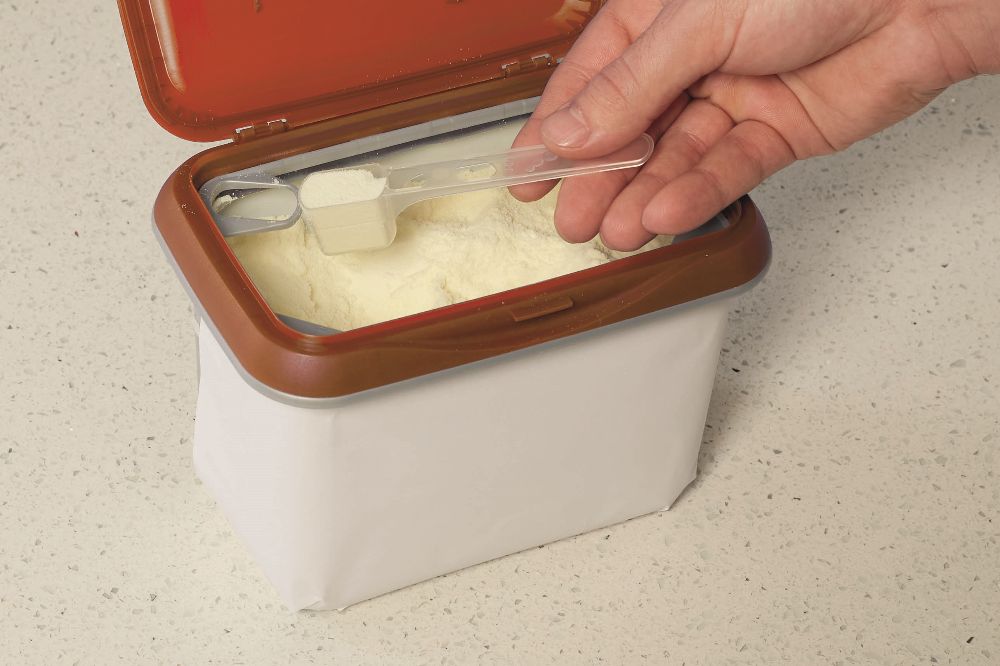
7. Loosely fill the supplied scoop with the formula powder and level it off using either the flat edge of a clean, dry knife or the leveller provided. Follow the manufacturer’s instructions and only put the suggested number of scoops in the bottle.

  Formula milk point 8.png

8. Holding the retaining ring, put it on the bottle and screw it on. Cover the teat with the cap and shake the bottle until the powder is dissolved.

  Formula milk point 9.png 

9. It is really important to cool the formula, so it is not too hot to drink. Cool the formula by holding the bottom half of the bottle under cold running water. Move the bottle about under the tap to ensure even cooling.
  Formula feeding to gp with point 10.jpg 

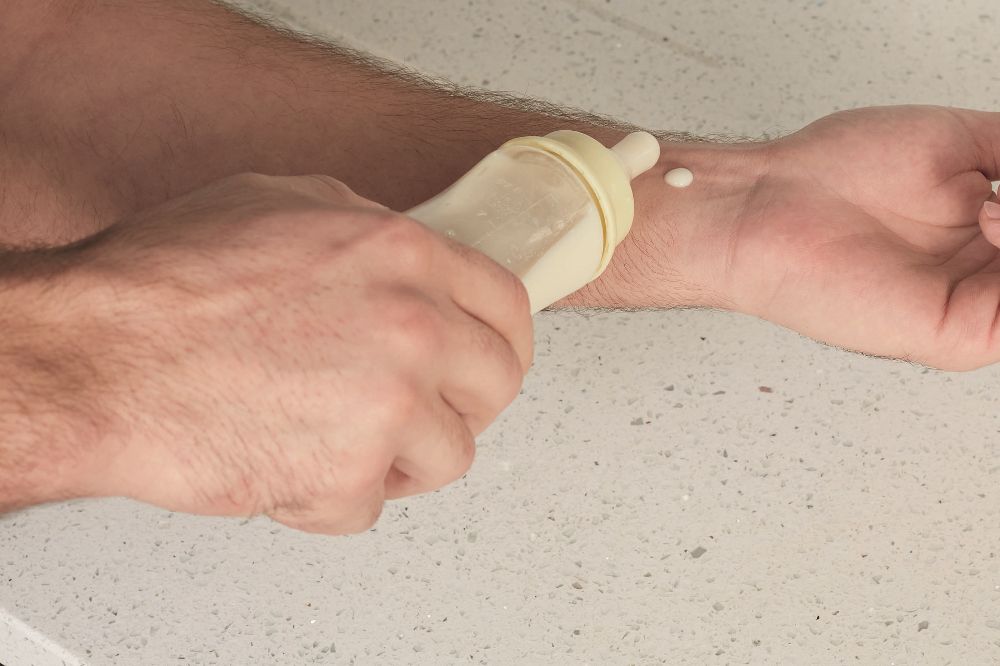
10. Test the temperature of the formula on the inside of your wrist before giving it to your baby. It should be body temperature, which means it should feel warm or cool, but not hot.

11.  If there is any formula left in the bottle after a feed, throw it away.

12. To reduce the risk of infection, make up formula feeds as your baby needs them. One at a time.

At present, there is no published research and insufficient evidence that these machines are safe to use when preparing infant formula. Powdered infant formula is not sterile and needs to be made up at a temperature which will kill any potential bacteria present. The Department of Health recommends that powdered infant formula is made up with a litre of freshly boiled water and left for no more than 30 minutes so that it remains at a temperature of at least 70°C. This will reduce the risk of your baby becoming unwell with bacterial infections, which can lead to sickness and diarrhoea.

For more information about the bacterial contamination of powdered infant formula, please visit:

www.firststepsnutrition.org/making-infant-milk-safely

Powdered infant formula is not sterile and needs to be made up at a temperature which will kill any potential bacteria present. The water added to the bottle should be fresh (not re-boiled) and at least 70°C when the powdered infant formula is added. Although different brands of hot taps provide water at different temperatures and the time taken to fill a bottle varies, the limited research available suggests that powdered infant formula should be added:

  • immediately if volumes of 2 to 3oz (60 to 90ml) are being made up
  • after no more than 5 minutes for volumes of 4oz to 5oz (120ml to 180ml)
  • after no more than 10 minutes for volumes 6oz to 8oz (210ml to 240ml)

For more information about making up bottles of infant formula from hot taps and baby kettles, please visit: www.firststepsnutrition.org/making-infant-milk-safely

Evidence examining the safety of baby kettles is limited. If you plan to use one, please visit www.firststepsnutrition.org/making-infant-milk-safely for further information

Cold tap water (boiled only once and cooled for no longer than 30 minutes) is best for preparing infant formula. However, in certain circumstances, you may need to use bottled water.

If you are using bottled water, you should:

  • use still water only, never use fizzy or sparkling water
  • always boil the bottled water before using it to make formula milk (bottled water is not sterile)

It is better not to use bottled water that is labelled as ‘natural mineral water’, as it can have higher levels of sodium and other minerals. However, it can be used temporarily to keep your baby hydrated if no other water is available.

  • Ready-to-feed liquid formula can be more convenient than powdered infant formula, but it is usually more expensive.
  • All feeding equipment will still need to be sterilised.
  • Ready-to-feed liquid infant formula is sterile until opened. However, once opened, it needs to be used more quickly than powdered infant formula.
  • Once opened, any unused ready-to-feed liquid infant formula that remains in the carton needs to be stored at the back of the fridge on the top shelf with the cut corner turned down. This should be used within 24 hours or discarded.

For more information about ready-to-feed liquid infant formula, please visit:

www.unicef.org.uk/babyfriendly/baby-friendly-resources/bottle-feeding-resources/guide-to-bottle-feeding 

www.firststepsnutrition.org/making-infant-milk-safely